
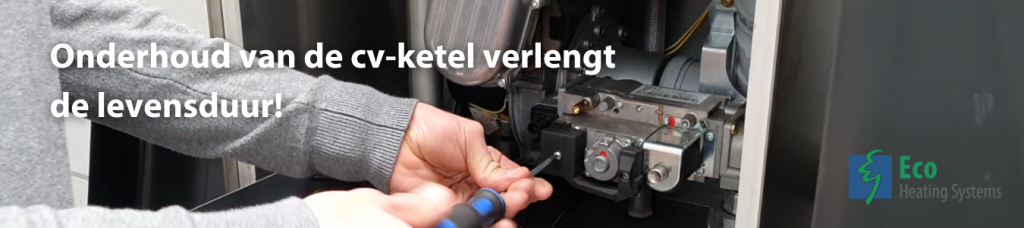
Maintenance of your central heating boiler or domestic hot water boiler is important for extending the lifespan of your system and helps prevent malfunctions. Regular maintenance is also crucial to ensure your boiler operates at optimal efficiency. During operation, natural gas is burned to heat the water in your heating system. This process causes buildup on the coils or pipes that the water flows through, and small combustion particles are released. Regular cleaning of the heat exchanger is therefore essential. Want to learn more about boiler maintenance? In this article, we’ll take a closer look at the maintenance process and key points to pay attention to during a service check of your central heating boiler.
What is inspected during central heating boiler maintenance
During a maintenance service, the boiler is checked for:
- Overall inspection, active faults, and the boiler's error history
- Cleaning of the heat exchanger
- Setting for optimal performance
- Check for safety and carbon monoxide emissions
A dedicated maintenance kit is available for Eco Heating Systems boilers. Read more about this central heating boiler maintenance kit.
Step-by-step maintenance procedure
During the boiler service, the installer follows a specific sequence of inspection and maintenance steps. Below, the process is explained step-by-step. You can also watch our video on central heating boiler maintenance.
1. Reading the computer fault history
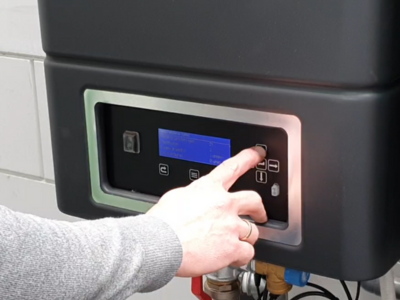
Begin by reading the fault history. The boiler's control unit logs this history meticulously, providing valuable insights for the maintenance task ahead. Next, release the casing using the clips at the bottom and remove the front panel. Watch the video for a step-by-step guide on reading the fault history.
2. Disconnecting the wiring
The various components inside the boiler are connected by electrical wiring. Before starting any maintenance, disconnect the wiring from the burner assembly, the fan, and the gas valve. Afterward, unscrew the gas coupling.
3. Unpacking the maintenance kit
Our maintenance kits are available for purchase at Wasco and Rensa. These kits contain all the components that should be replaced during a service, such as gaskets, an ignition electrode, a fiber rope, and the insulation for both the backplate and the burner door. They also include detailed instructions on how to perform the service. Watch our video to see the contents of a maintenance kit.
4. Cleaning the heat exchanger
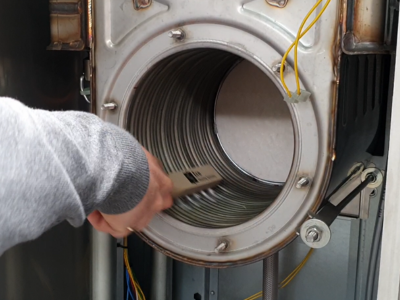
The heat exchangers in Eco Heating Systems appliances are made of stainless steel. Remove the burner plate along with the burner from the lower chamber of the heat exchanger. Inspect the backplate and the burner door insulation, and replace them if necessary using the new ones provided in the maintenance kit. Next, clean the heat exchanger by brushing down the coils with a brush, then thoroughly vacuuming out any loose debris. Watch our video on cleaning the heat exchanger to see how this is done. If you want to learn more about how a heat exchanger operates, read our dedicated blog on the topic.
5. Replacing the ignition electrode, gaskets, and other components
A new ignition electrode is included in the maintenance kit; we recommend replacing it during every annual service. Pay close attention to the distance between the electrode and the burner to ensure optimal operation. Replace the non-return valve once every five years, and replace the fiber rope if necessary. Always replace the gas coupling gasket and the gasket between the burner nose and the non-return valve during each service. Next, remount the burner into the exchanger and torque the screws to 8 Newton-meters using a torque wrench. Reconnect the cables to the burner assembly, the fan, and the gas valve. Individual spare parts can be ordered from Wasco, where you can select exactly what you need via their parts finder.
6. Flushing the siphon
The siphon, which drains the condensate water, is attached to the bottom of the boiler. Flush and clean the siphon thoroughly, then refill it with clean water before reinstalling and reconnecting it.
7. Gas leak testing and activating the boiler
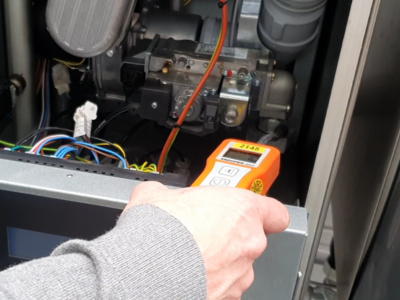
Check for gas leaks around the gas valve and the gas coupling inside the boiler using a gas leak detector. This device measures the concentration of methane and propane in the air. Once verified safe, turn the boiler back on. Bleed the air out of the boiler by temporarily disabling the pump; you can do this by holding down the enter button for 10 seconds.
8. Performing a flue gas analysis and checking the gas valve calibration
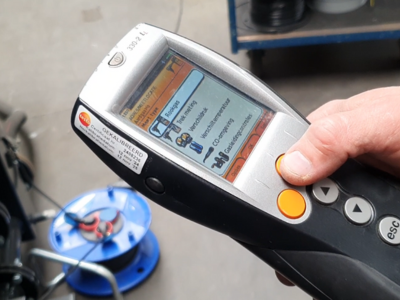
A flue gas analysis measures the composition of the gases released during the combustion process. Insert the flue gas probe into the flue duct. This analysis measures the flue gas temperature and the amount of carbon monoxide (CO). It also checks the ratio between oxygen and carbon dioxide ($CO_2$) to ensure optimal combustion and maximum efficiency. Perform this analysis at both high and low capacity. The gas valve can be adjusted here to achieve optimal, safe combustion.
At the end of the maintenance service, reset the Service Reminder. This allows the boiler to automatically determine when its next service is due based on its total operational burning hours. Finally, reinstall the outer casing of the boiler. Don't forget your tools!
Want to know more about central heating boiler maintenance?
Would you like to know more about the maintenance, repair, or adjustment of a central heating boiler or domestic hot water boiler? Feel free to contact us. Our service department is ready to assist you, providing advice and helping with your queries. We are here for you. We are also available outside of office hours and on weekends. Want to learn more about the specifications of our central heating boilers? Read more on our website.


 Back to the overview